Hardware required:
- VR-capable Gaming PC. See your headset manufacturer’s recommendations, but generally this:
- i5 or Ryzen 5 or better CPU *
- Discrete GPU with at least 4G of video RAM
- For Quest, a link between the headset and PC, either with Airlink or a link cable
- Airlink:
- The PC should be on wired ethernet. The PC does not need to be near where you are using your headset, just on the same network. You can control it through your headset.
- The headset should be close to your router. It doesn’t necessarily need to be in the same room, but you do need a strong signal for acceptable results.
- Ensure that you connect to a 5GHz WiFi band with the headset.
- Link Cable:
- USB-C cable with super-speed capability (USB3 speed). Obviously, the PC needs to be close enough for your USB cable to reach.
- The Oculus-branded cable works of course, but so do many others.
- Does not require that the PC use wired Ethernet
- More information here: https://support.oculus.com/airlink/
- Airlink:
* I’ve heard of one report of this working with an i3 but do not have details at this time. Everything that you need is free, so you might just want to try it
Software required:
- Windows software for the headset
- If you have a PCVR-only headset, you already have this.
- For Quest, download the Oculus app from the Windows store (or directly from Meta).
- Steam
- It’s free. Get it from steampowered.com
- Once it is installed, login or create a new account
- The following programs from the Steam store. They’re also free.
- SteamVR
- OpenVR Advanced Settings
- Bigscreen VR
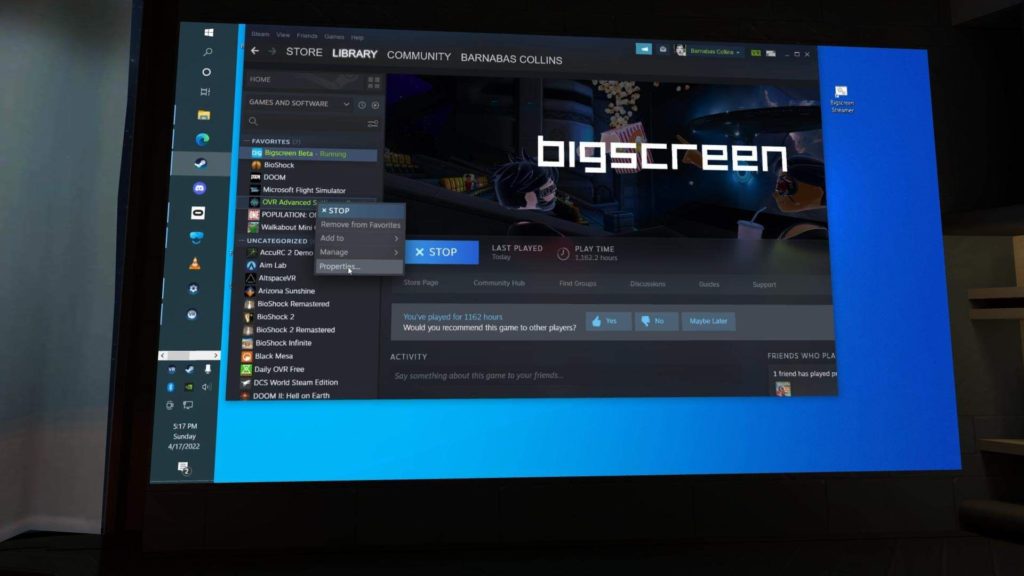
You should not enable any beta channel for OVR Advanced Settings. Right-click on its name in your steam library and choose Properties:
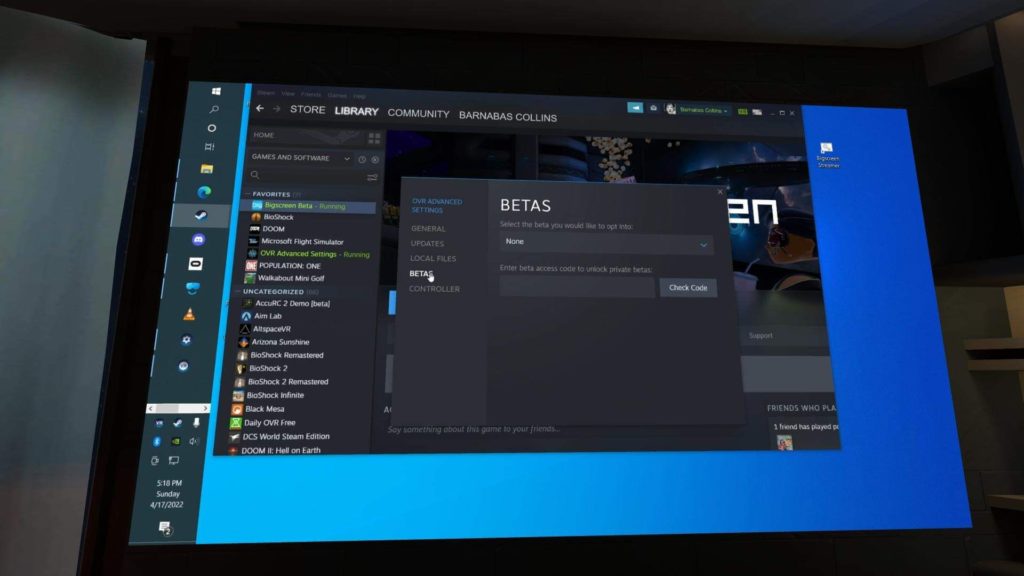
In the panel that pops up, select “Betas” on the left, and ensure that “None” is chosen:
Special considerations for Oculus/Meta users (Rift or Quest):
- For the Quest, get the link working between your PC and headset first.
- In the Oculus PC application, enable unknown sources:
- Click “Settings” in the left-hand pane
- Click the “General” tab
- Enable the option for “Unknown Sources”
- Start OVR Advanced Settings from your Steam library page
- You may need to select “All Software” in the filter to see this.
- See images in the next page, OVRAS Settings Menu
- This will start Steam VR if it is not already running.
- Put on your headset (if it’s to already on) and you should be in the Steam VR home
- Click the Oculus button on your left controller.
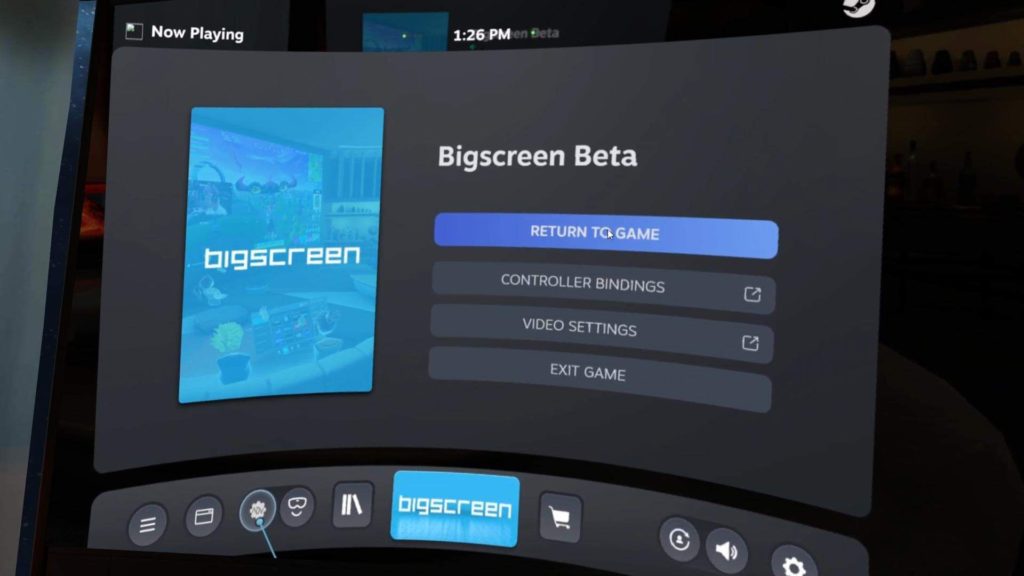
- The Steam menu that comes up will have a small icon on the bottom, near the left side, which looks like a gear with “ADV” written on it. That brings up the control panel for OVR Advanced Settings. See the image below.
- In the OVR Advanced Settings menu, click on “Settings” at the bottom left
- Enable the setting for “Force Use Steam VR”
- You may want to ensure that “Auto start” is disable, so you can prevent Steam VR from being forced if you don’t want it in use.
- See the next page, OVRAS Settings Menu, for images of this menu.
- Start Bigscreen, either from your Steam library page on the desktop, or from a link within your Steam VR home.
- In the future, you will have to start OVR Advanced Settings prior to starting Bigscreen. Then it will force Steam VR mode and allow you to fly.
- If you’re playing games that can use the Oculus VR mode and don’t want to use Steam VR mode, shutdown OVR Advanced Settings prior to starting the game.
The Steam menu, with the OVR Advanced Settings link at the bottom. This is visible from within your headset: